DataWeave is the main expression language in Mule 4, and with the recent version 2.0, it is the sole transformation language in a Mule 4 application. DataWeave is a powerful and rich scripting language, which supports a variety of useful functions for data manipulations and transformations. It employs a functional programming principle, which means that functions don't have states and side effects. DataWeave functions can also be called recursively (I have done some recursive functions before but will think of a simple concrete example).
If you want to read and study more about DataWeave, and familiarize yourself with the different supported functions, go to https://docs.mulesoft.com/mule-runtime/4.2/dw-functions
The DataWeave related functions are organized into modules. There are core modules, string modules, binary, cryptography, and a lot more. DataWeave is quite extensible, and I think in future upgrades of Mule we will see additional modules that would address more use cases. In my experience though, the core module covers most of the use cases, and the current DataWeave itself is sufficient in such a way that you don't need to write scripts in another language like Java or Groovy. Apart from the core modules and other out-of-the-box modules provided in Mule 4, we can also create our own custom DataWeave modules within our Mule project. Modules are packages (or libraries) of reusable scripts, not just functions but variables as well. In my experience, modularizing your DataWeave scripts has the following advantages:
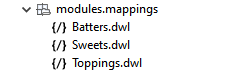
1. Data Mapping. This can sometimes be a humongous task, especially when the payload you need to transform is quite huge and contains a large subset of data. If you have hundreds or even thousands of fields for example, it is not ideal to write your Dataweave script in a single file. You can breakdown your mappings into different subsets of data types, so that multiple developers can work on them at the same time. For a simplified example, I have a JSON payload that I will transform to an XML payload. The JSON payload has three sets of data: Sweets, Batters, and Toppings. I will create 3 different dwl files for each data type. Below is the content of the Batters.dwl file. It contains one function called mapBatters, which creates the structure for the Batter XML node. It accepts one input parameter of Array type. We use a map function on this parameter to iterate through each item and map the child fields of the XML node. We can do this for all subset of data types. This also makes our scripts more readable and maintainable.
2. Segregating the business rules. Sometimes the business rules are dynamic and volatile. Rules are certain filters and/or conditions, which the data should meet and satisfy before sending them to the receiving system or client application.

For example, we only want to filter the ID for Batters that belong to a specific set, or Toppings that are only of specific type. We can have a separate package and write a DataWeave function(s) to achieve this goal as shown in the example above. Separating the business rules will make future changes more maintainable.
3. Data Translations. Translation means that we want to convert the data values from one system to those equivalent values accepted and understood in another system. Literally, think of it as translating one language into another (Chinese to English).
For that we can have another package for this purpose and write a DataWeave script. This time we will only create a variable which is of dictionary type and is suitable for this goal.
Next, we will combine all of these scripts into a main Dataweave file. As shown below, this particular script builds the entire structure of the parent XML node called Sweet.
In order to use the functions from other DWL files, we need to add an import statement. After the from keyword, you need to concatenate the fully qualified package name in your project (under src/main/resources) and the file name of the DWL file (without the dwl extension).
In the Transform Message component, import the Sweets module as well, and specify the output type as application/xml. XML always requires a root node, and as shown below you need to have a root element.
Testing your DataWeave script is also easily done in Mule Studio. Just paste a sample JSON input payload on the left side, and then you will instantly see the resulting XML payload on the right side.

If you have any comments, questions, or suggestions, feel free to comment on this post. :)


Comments
Post a Comment